![]()
The printer in our house does not have any network capabilities, wifi nor ethernet, so printing is always a hassle. Someone who wants to print first has to send the file to the computer connected directly to the printer (currently my desktop), then ask the owner of that computer (me) to print their file. Our setup wasn’t always so ugly, we used to have our printer connected to our router. This allowed any device on the network to print using proprietary software, which worked well. However now our router and printer are no longer in the same room.
I want to regain this remote print functionality. To do so I will be using an Intel Edison as a Print Server (might be overkill, but I had one lying around). Here is part 1 of the process - the initial setup of the Intel Edison (flashing and getting access to the terminal).
For this project you will need an Intel Edison, a base block, a micro-usb cable for power/console, and another micro-usb cable for OTG.
1) First you need put all the hardware together, fortunately it’s really simple. Insert your Edison into your base board, and then plug in the two micro-usb cables into the board and your computer.
2) Next you need to download and run the configuration tool from intel’s website. This is also pretty straightforward, just follow
the onscreen instructions to install drivers, flash the latest firmware, enable ssh security, and connect to wifi. You should come to a screen that looks like this:
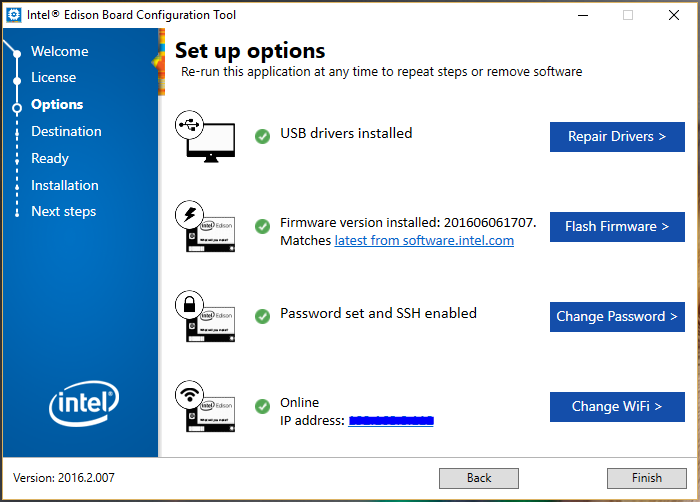 Make sure to note the password you set when enabling security, you will need it later.
3) Now that the edison is flashed, we need to be able to view the terminal of the Linux distro running on it. Since I’m on Windows, I’ll be using Putty. Here are the directions for MacOS and Linux. Open Putty and then:
-
Select ‘Serial’ for connection type and change serial line to COM port assigned by your computer
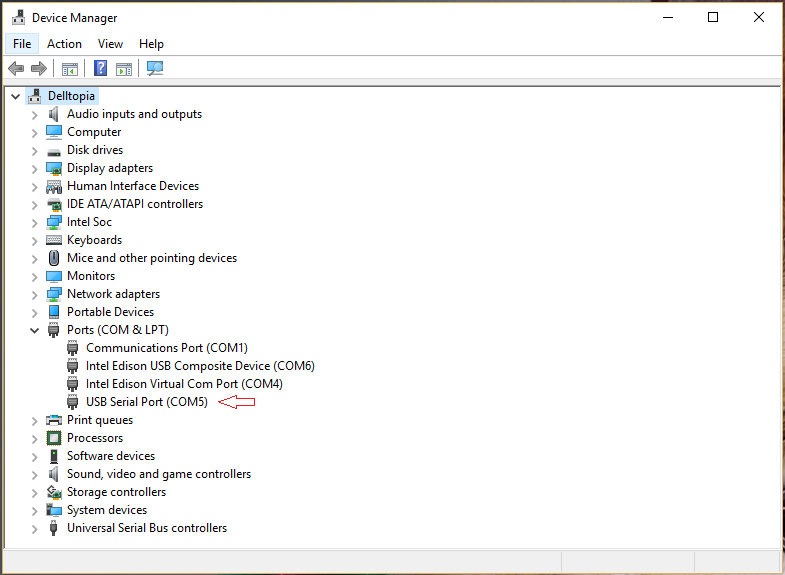 to find your port, open device manager, expand the “Ports” dropdown list, and find what “USB Serial Port” is assigned to (COM 5 for me)
-
Set the Speed to 115200
-
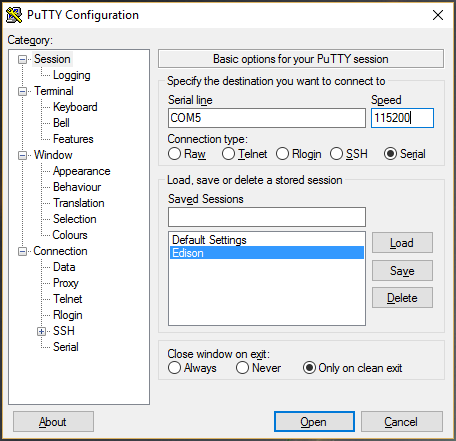
click open (you can also save the session for quick access in the future)
4) When the terminal window should loads a blank screen press the enter key. You should now be prompted for your credentials. For login enter “root” and for password enter whatever you set when enabling security during the edison configuration.
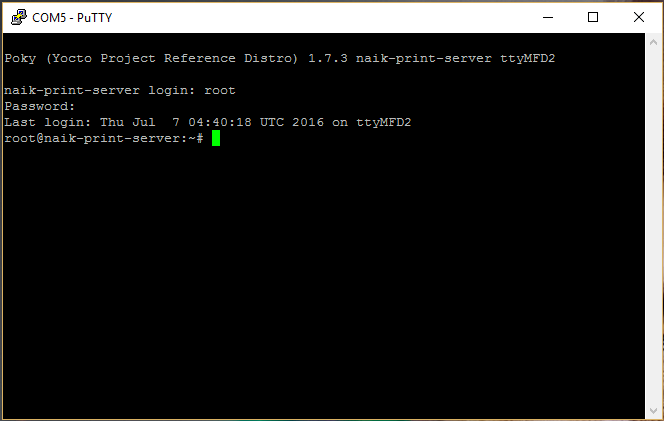
The Intel Edison is now setup and ready to be turned into a print server.
Check back for Part 2 of this project where I will go over the configuration of the actual server/software.